Painting, Weathering and final touches
- Lukasz Gmerek

- Jan 17, 2021
- 8 min read
Updated: Jun 23, 2023
Painting wise it is three-colour scheme which was adopted during 1938. This comprises RLM 70 Schwarzgrun (Black Green) and RLM 71 Dunkelgrun (Dark Green) in a splinter-pattern on the upper surfaces and RLM 65 Hellblau on the undersides. Additionally this aircraft had white fuselage band, green spinner and white vertical bars applied to the front of both wheel covers.
It seems that all Late models of R-2 had trailing aerial mast removed from the underside and in place of that there was a blister which contained a radio equipment (Pell G.IV D/F loop), so before painting commenced I sculpted such part using Tamiya Epoxy Putty and glued it to the underside of the fuselage - as for the first time sculpting anything I am pretty happy with the result.
Pre-shading and Base Colors
Painting process was started with pre shading panel lines, access hatches and rivet lines. I used here different colours - for panel lines and rivet lines it was dark gray for the underside and black on the top. Access hatches were outlined with dark colour and filled in with brown. I used here quite nicely diluted Tamiya paints, airbrushing with my PS-770 detail airbrush.
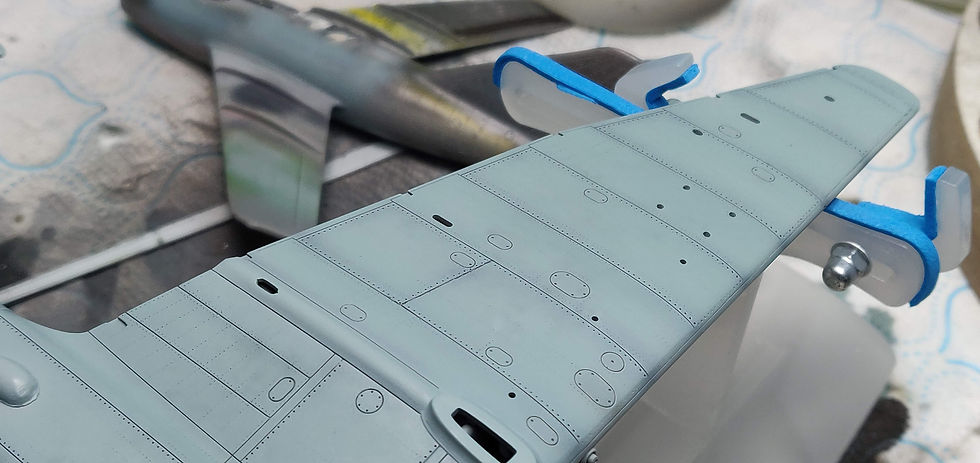
Next I airbrushed base colour on the underside with Iwata HP - CH using Mr. Color 115 (RLM 65) Hellblau. I thinned the paint considerably and applied it in thin, transparent layers to gradually cover the pre-shading until I was satisfied with the resulting contrast. I left the model for the night giving the paint time to dry properly. Next I masked the underside using tamiya type and kitchen foil.

First color for the upper surfaces followed - Mr. Color 17 (RLM 71) Dark Green. Beforehand I marked where the paint should be applied with the pencil and airbrushed it free hand trying no to overspray too much the marked borders. Again paint was diluted considerably and applied in thin layers.
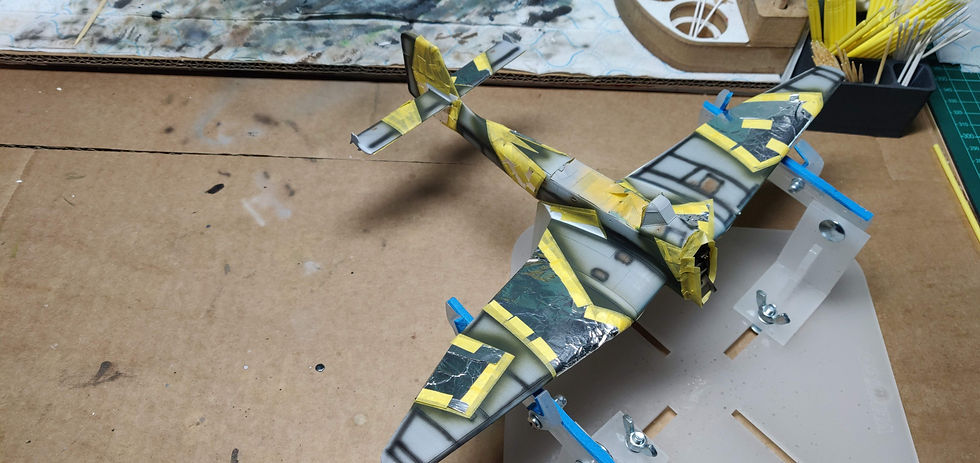
Second stage of masking followed (again using Tamiya type as those schemes had very sharp demarcation in the camouflage) and then Mr. Color 18 (RLM 70) Black Green was applied. As soon as it was dry to the touch I removed all masks to check the results. It turned out that there were a couple of places which required some rectification - nothing major though. Last color applied was the white band on the fuselage. Here I carefully measured band width looking at the camouflage scheme and then rescaled it appropriately to properly apply the masksing type. Before airbrushing white I did light pre-shading as well.
Highlights and Fading
Looking at photos of Stuka's during WWII they looked rather worn out and exhausted, so my goal was to try to recreate it with different weathering techniques, but for that I needed a proper groundwork. After applying pre-shading and main camouflage the paint still looked a little dull and monotone. To imitate worn paint due to usage, sun exposure and weather conditions I went for lightning and darkening of panels
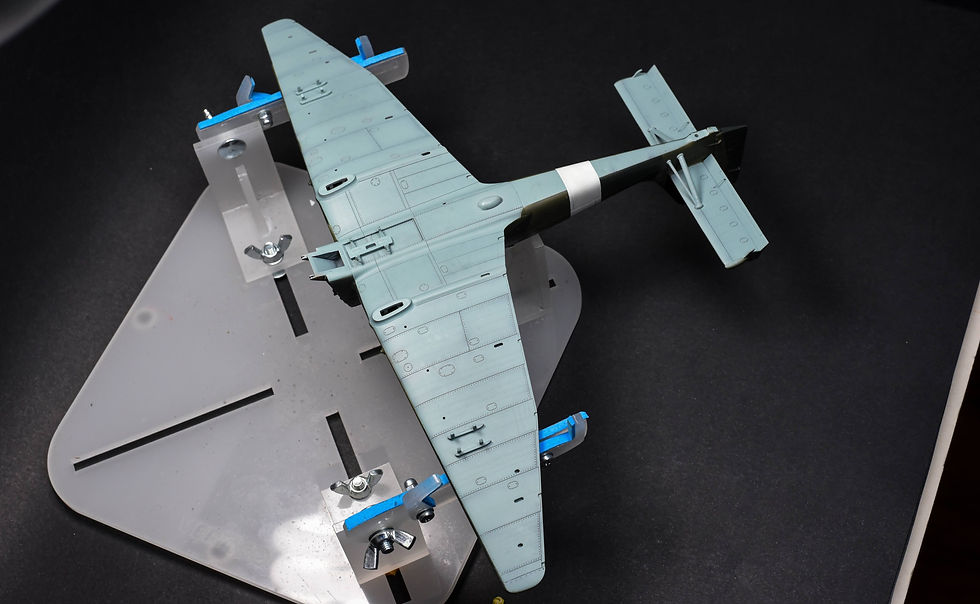
I started with the underside. I made a lighter shade of RLM 65 by adding a little white paint and then airbrushed it randomly over panels using Uschi van der Rosten Splatter Stencils set. Next step was similar but with the darker shade of RLM 65. Using stencils set helps a lot with random application of paint but it does not mean you do not need
to be careful. I still tried to avoid applying lighter shade over panel lines and used different stencils on different parts of the model.
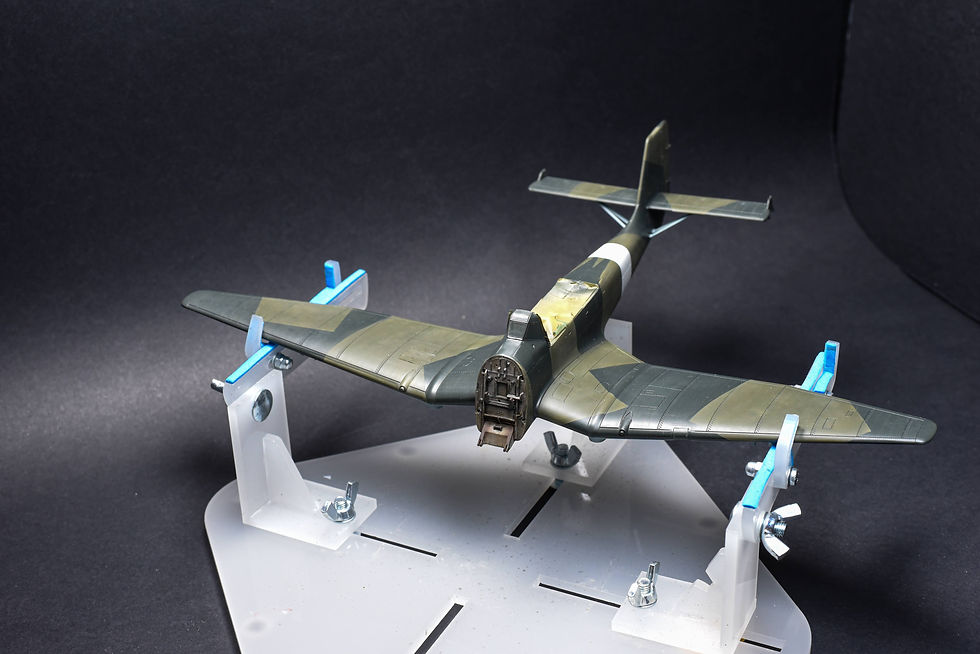
The effect of applying different shades of camouflage colours was then softened by airbrushing a highly diluted base color over it. Last step before applying gloss clear coat was to imitate non-slip surfaces on the wing roots - for that I used Ammo mig Anti Slip paste for 1/48 1/72 scale. It is applied by brush of sponge by stippling motion to create the texture. It was first time I used that product and it seems the resulting texture is a bit overscale - nothing drastic but still I will be more careful when applying it next time. Next I applied metallic paint as the base, then chipping fluid from Ammo and on top very dark colour (black dillutied with a bit of gray). As soon as the paint was dry to the touch I moistened it with water and used toothpick to scratch the top color to reveal imitation of metal beneath.
Decaling
After application of gloss clear coat I commenced with decals. As use of flags from the German Third Reich (1933–1945) is currently subject to legal restrictions in a number of countries some decals set do not include them (at least not as one decal). My set of Stuka EXPERT kabuki masks contained masks for swastika symbol so I decided to use it and try to paint symbols with airbrush for the first time - I turned out to be quite simple technique which great results.
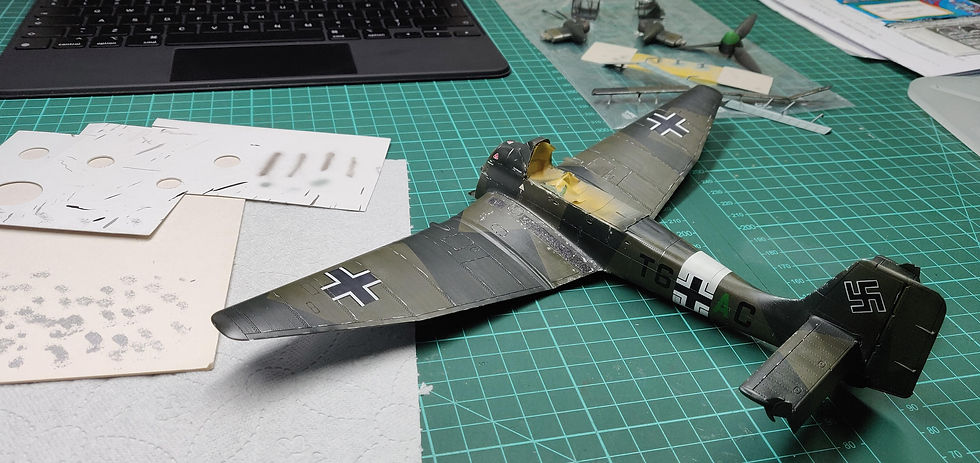
I used EagleCals #144 Stuka Ju 87 B/R for main insignia and wet transfer from H-Models for stencils. I had no problems at all with application of decals - using Micro SET and SOL was everything was needed. Wet transfers though - that was much different story unfortunately. It was the first time for me to use them, but to be honest there is nothing complicated - just cut the part, soak in hot water, wait till the decal loses its base paper, apply as regular decal, push the water from below and wait a few hours for it to dry. What happened in my case was that when I was removing the transfer foil, the applied stencils were removed as well. I thought that maybe I have not waited long enough so used another set of wet transfers and this time gave it 8 hours before removing the foil - unfortunately the effect was the same... Till this day I have no idea if it was me doing something wrong or maybe I just happened to receive bad product? In the end I used stencils from the EagleCals set and applied another gloss clear coat to secure the work before weathering begins.
Chipping and Filters
Weathering started with imitating paint damages that create different types of paint chips, scratches and pitting. At this stage I used mainly two techniques: brush painted chipping and sponge chipping. Later on I applied pencil chipping as well.
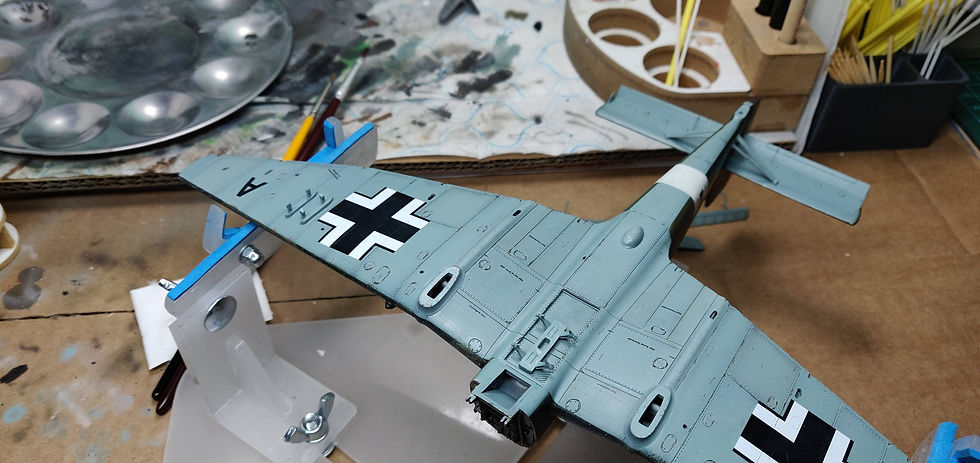
I started with the underside with preparation of lighter shade of RLM 65 - for that I used Hataka Blue line B029 Light Blue color with mixed with a bit of white. Using small good quality brush I painted the chips concentrating them in high-wear areas. Next I used the same technique but with different color - this time it was dark brown. Next sponge chipping followed with the lighter color again to introduce more variety paint damages.
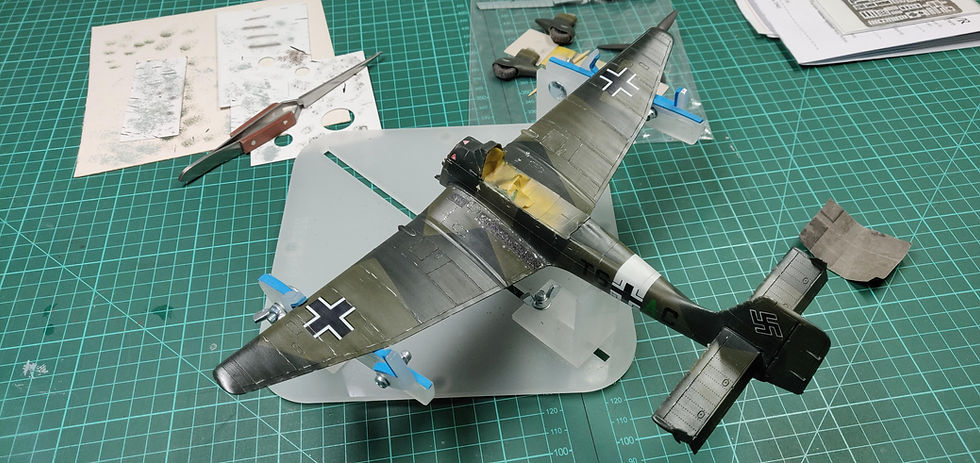
Same techniques were applied on the upper surfaces of the model, but this time I used metallic color as well (Metal acrylic range from mig Ammo).
Next I applied filters over specific panels to set them apart and add contrast and variety - this is especially visible on the underside. Before applying further weathering effects I secured the work with layer of gloss clear coat.
Dirt, Grim and Fading
Below I described few methods that I used for general weathering of camouflage scheme.
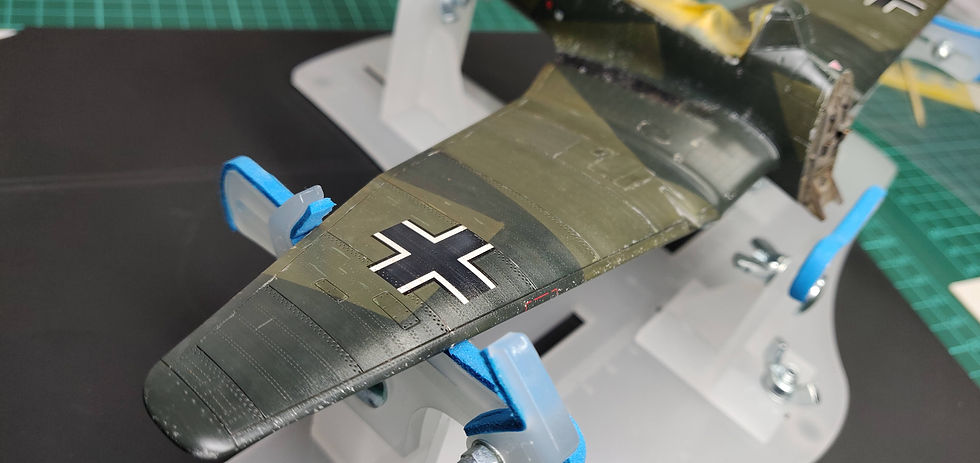
First I used so called Enamel Fading which consists of blending tiny amounts of paint of different colors onto the camouflage to add subtle chromatic variation. I used that on the upper surfaces of the wings as well as vertical and horizontal stabilizers.

Next it was time recreate first layer of dirt and grim on the underside of the fuselage. For that I used different enamel products. I spread them out in certain places and then blended with dry brush. Aside of that I imitated splashes by soaking the brush in prepared mix of enamel product and then pulling the bristles back with the toothpick - this projected small specks of color on the surface. Next I used enamel products to enhance raised surface details and accent shadows. Last step before layer of flat clear coat was to apply panel line and rivet lines washes - here I used products from PLW line from ammo Mig. Having mat surface I used weathering pencils from AK Interactive to add additional layer of weathering. Next I airbrushed semi-gloss clear coat.
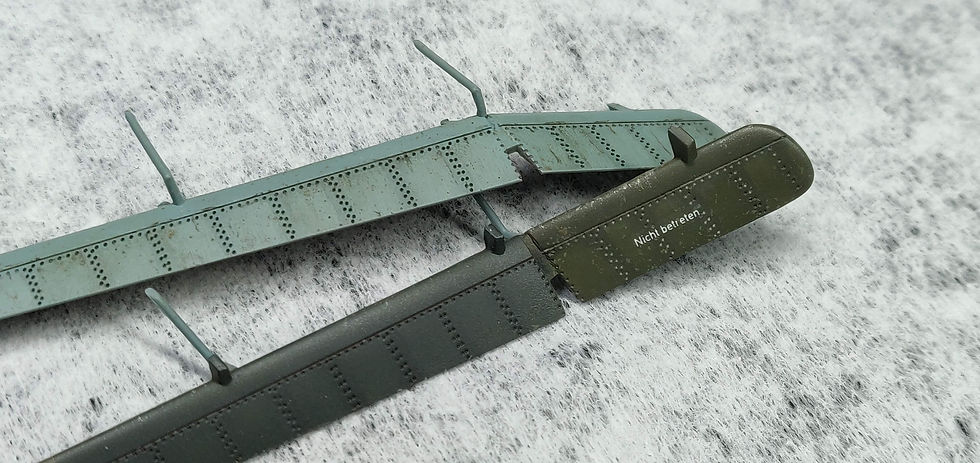
In the meantime I painted and weathered flaps - I used here some of the techniques described above. What I did additionally here was to mask the rivet lines with the Tamiya type and spray panels inside with the lighter shade to increase contrast even more.
Streaking Effects, Spill Stains and General Washes
Final weathering effects applied where to represent dirt dragged back by the airflow during the flight as well as spill marks in specific locations.
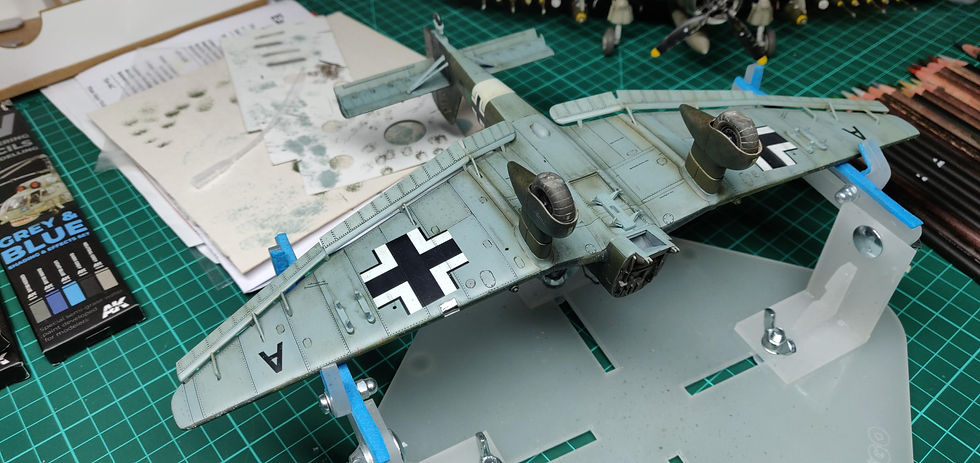
For streaking effects I used Streaking Brushers from mig Ammo by brushing the product along the pane lines or other areas and using the clean brush I extended the product. Depending on consistency of the product and time between application and blending we can achieve many different and interesting results.
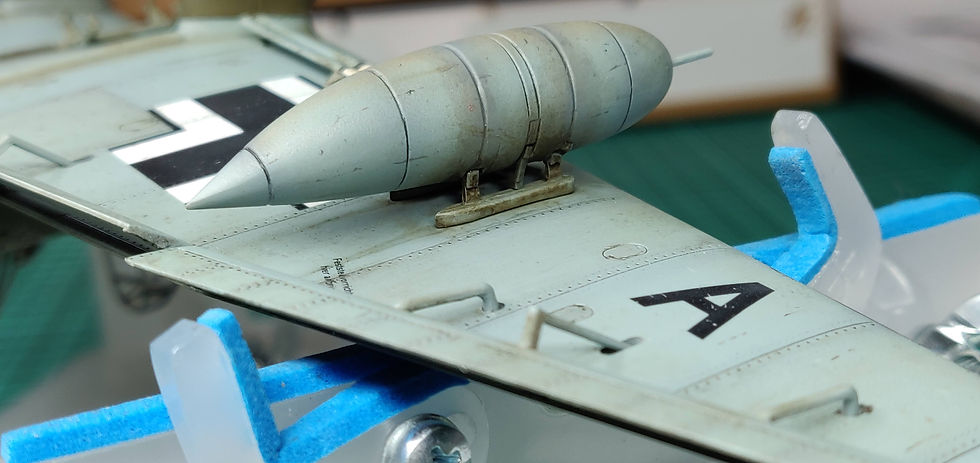
Additionally in some places I used Oil brushers to similar effect as can be seen on this photograph. In the meantime I assembled external fuel tanks, painted and weathered them accordingly.
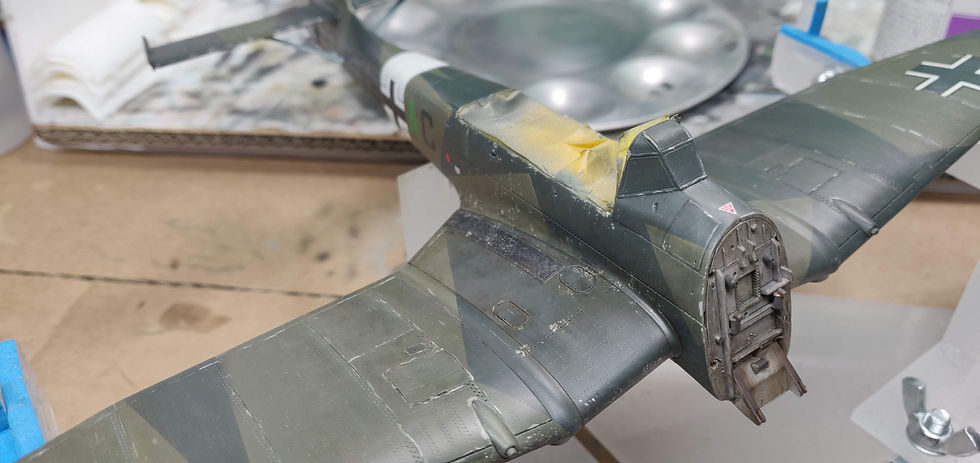
Last weathering effect I wanted to achieve before applying final layer of clear semi-gloss layer was a very weary and fatigued surface of the wing roots. I used here different colour of washes - I extended them unevenly across the surface and while still fresh I started working on it with a dabbing motion of the brush to form different groups of stains. Again you can control the effect with time between application and blending.
Model finalization and weathering with Pigments
Having final coat of varnish applied I removed all remaining masks and checked if there are any places which required corrections - there were a few so I quickly handled that. Next I took care of exhaust stains - here I used mix of different colors which I heavily diluted and airbrushed. Next I used liquid pigments from Lifecolor to highlight certain patterns in the stains. Last step was to carefully apply pigments.
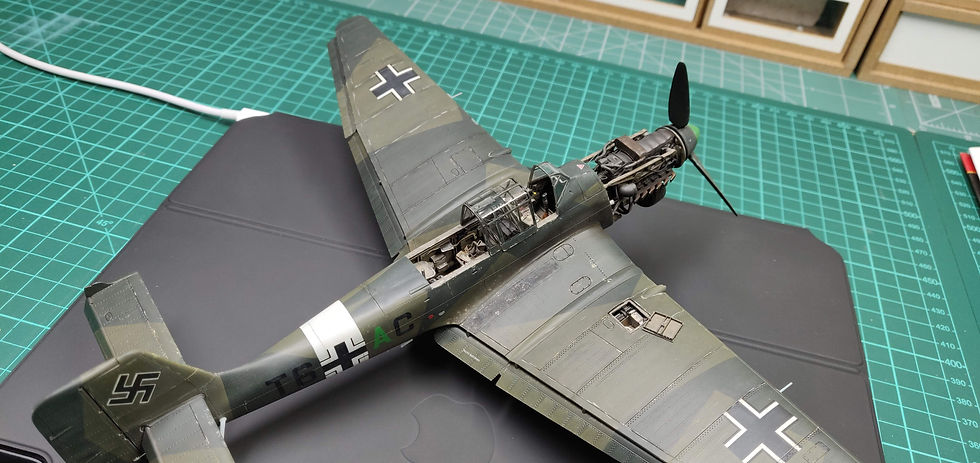
Now it was time to mount all remaining parts which were painted and weathered separately - that included fuel tanks, bomb rack, landing gear, canopy together with machine gun, canon hatch on the starboard wing and other small elements like pitot tube and antenas. In the meantime I scratch builded navigation lights and glued them as well. Next I applied pigments on wing roots to further enhance weathering there and then added fresh oil and fuel stains in some places. Lastly I created antenna wire together with insulators and Stuka was ready!
To sum it all up, it was a really nice project which took me about 4 months. I am certainly happy with the final effect. I made few mistakes here and there but nothing I couldn't fix. I learnt new tricks, tried new techniques like shading camouflage color with stencils, using putty to sculpt a blister, paining insignia, or scratch building navigation lights using clear plastic sprue, lighter and Eduard template. Aside I tried new approach with stencils (wet transfers) and failed ;) though I do not know why. I can certainly say that my airbrushing technique is much further improved as well.
Now I need a bit of time to recharge batteries as the next project is going to be a model released by Tamiya last year - American WW2 aircraft which fought along P-39s, P-40s, F6Fs and other types in the Pacific Theater. When finished, it will be the first twin-engined airplane in my stable :)
For the final gallery please follow to the project page Junkers Ju-87 R-2 (Late Production)


Comments